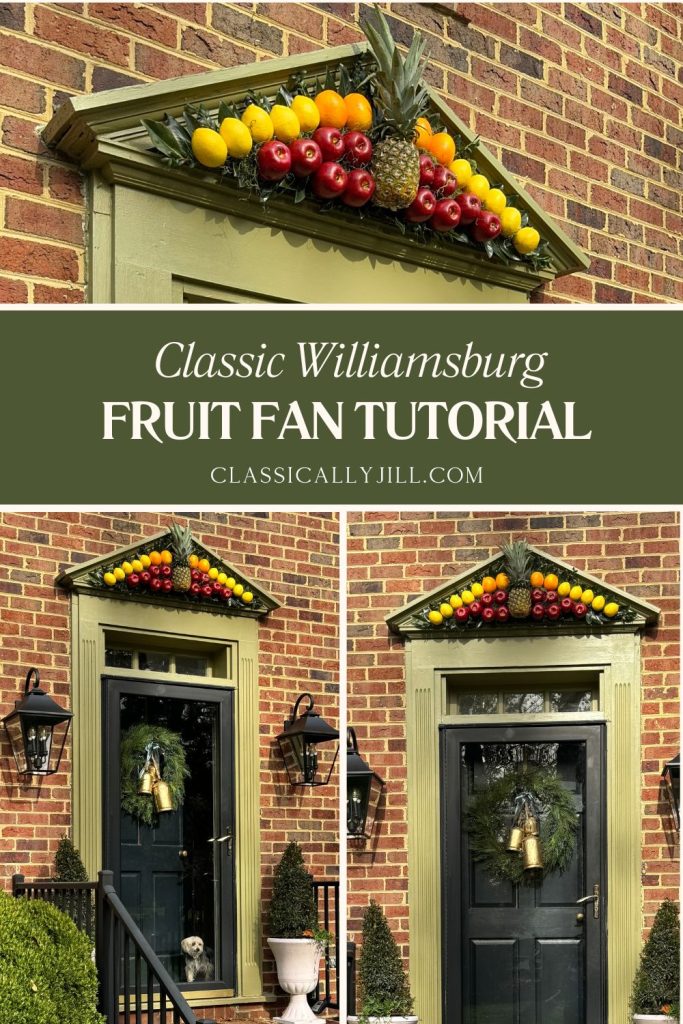
Ever since we bought this house, I knew I wanted to build a Williamsburg fruit fan display for it during the holidays. It has the perfect niche above the doorway for one! Mike was on board and started the project by measuring the triangle. He purchased and cut plywood to size and spray painted it black so it would recede.
I shopped for faux fruit for the display. Ordinarily, these displays use real fruit, but I’m afraid of attracting squirrels or mice to our home. Plus, I can reuse the board next year, if it fairs well over the next few weeks.
Fruit fans also usually have boxwood and magnolia leaves, which I fortunately have in my yard. I clipped a few fresh pieces.
I started by laying out the magnolia leaves along the top of the board. I placed larger leaves towards the middle and smaller ones along the sides. Once I was satisfied with their layout, I used hot glue to put them in place. I added a drop of glue to the back of the leaf and pressed it onto the board, holding it in place for a few seconds.
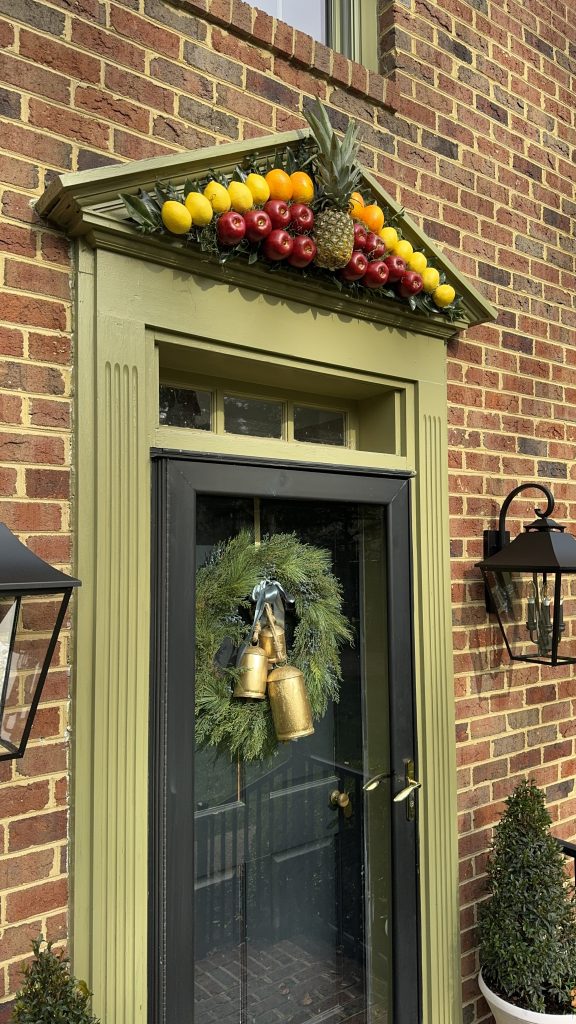
I then added a few sprigs of boxwood every few leaves, with the leaves hanging slightly over the top of the board. I also glued boxwood along the bottom of the board. Then, I covered the board lightly with one bag of faux moss. I secured that in place by gluing where the moss naturally was more clumped. I didn’t go overboard with the glue since the fruit would also hold the moss in place.
Next, I laid my pineapple in the center of the board. I couldn’t find a faux pineapple that I liked, so I’m using a fresh pineapple. I wouldn’t recommend this if you live somewhere warm (I could have never done this in South Florida).
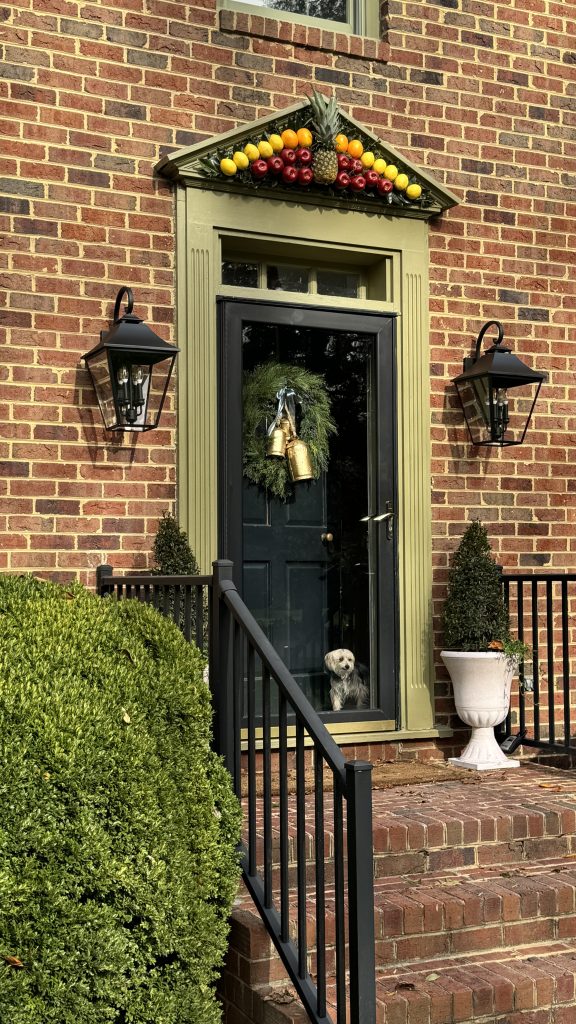
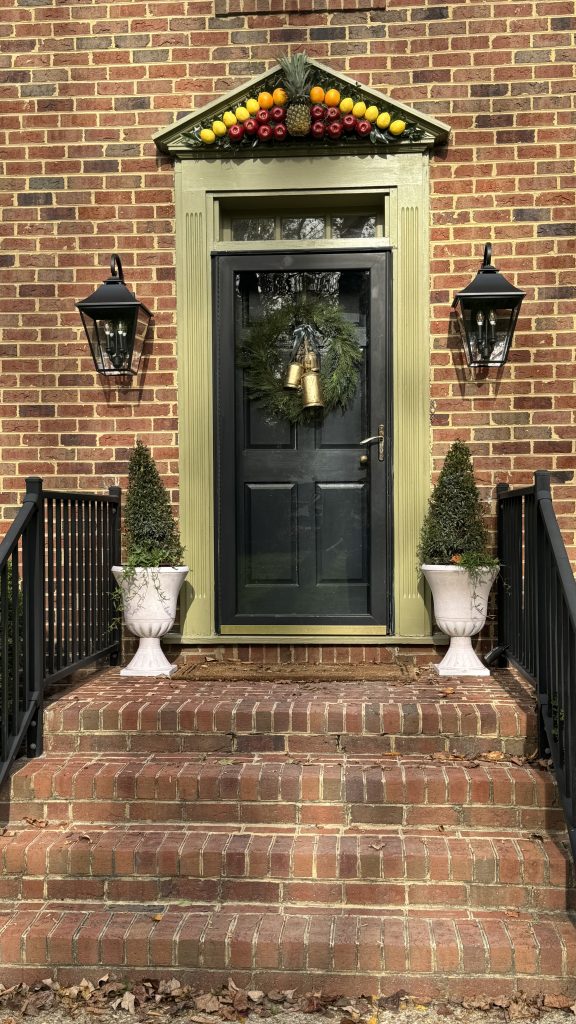
Once I liked the placement of the pineapple, I began laying my fruit. I did a few different patterns but landed on a mixture of lemon, orange, and red apples. I laid all of my lemons along the top, in a row. I tried to keep the fruit in neat lines instead of placing it at random. I do think maintaining straighter lines and symmetry is important for achieving the style.
Once I liked the placement, I began gluing the fruit down, starting from the center beside the pineapple and working my way out.
To glue, I used hot glue on the fruit, applying it generously. I then quickly placed the glue side down onto the board, holding it for a few seconds until it dried and adhered to the board. For some fruit, I also added additional glue to the sides along the board to give it extra grip.
I continued with each piece of fruit until it was all secured.
At this point, I added some finishing touches, including adding a few magnolia leaves in bare sports and along the bottom. Keep it mind that your board will be above eye level, so guests will see the bottom of the board the most closely. Don’t neglect it or have large globs of glue. Hide those with additional leaves. I also tucked in some more moss between the fruit.
Because the pineapple is heavier, we needed to secure it with screws. Mike first drilled into he board two holes where the pineapple will be laid. He then climbed under the table and screwed two long screws through those holes – get at least 2″ long screws, perhaps more depending on the depth of your plywood.
We then took the plywood to the front door. One our triangle, Mike installed an additional piece of wood by screwing the wood down into the bottom part of our triangle. Then, he mounted the fruit fan board to that piece of wood. Use screws so that you can unscrew everything at the end of the holidays.
We then staked the pineapple by forcing it onto those screws, securing it additionally with some floral wire.
If you’re more of a visual learner, watch my YouTube tutorial, where I show you step by step how to make your own Williamsburg fruit fan.
We’re loving the look of our front door decor! If you try this DIY, please tag me @classicallyjill on Instagram or comment on YouTube. Thanks!