Our Small Pantry Makeover DIY Project was nothing short of an adventure. Turning a small, cluttered space into a fully functional, organized pantry required creativity, a bit of elbow grease, and a passion for DIY. Today, we’re sharing our journey with you, from the initial idea to the final, amazing result.
Understanding the Need for a Pantry Makeover
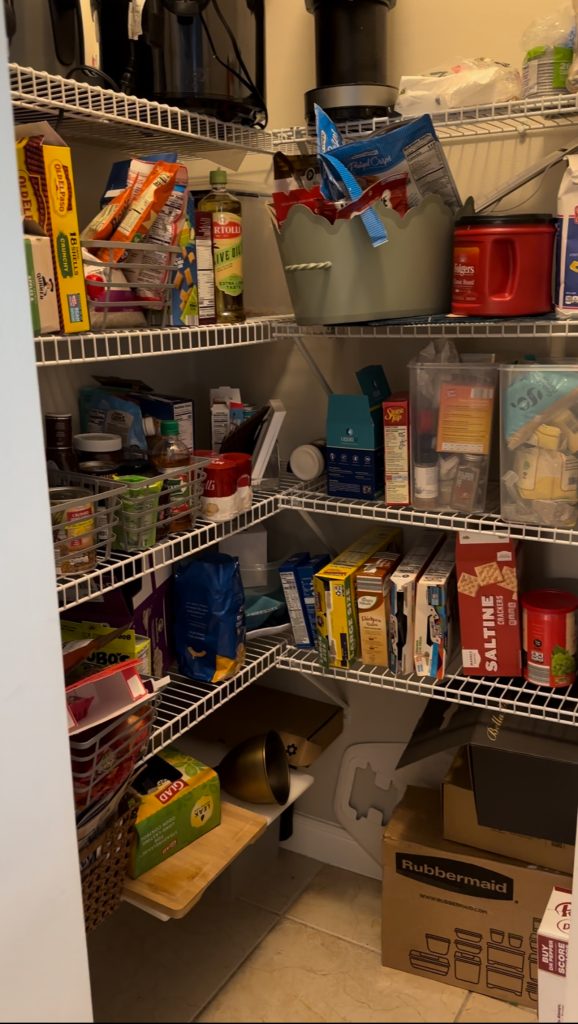
Our small pantry was a chaotic jigsaw puzzle at best, filled to the brim with cans, boxes, and miscellaneous household items we didn’t have a real place for. Each venture into this compact space felt like a game of Jenga, as we risked our lives pulling out a box of cereal. Call Dr. Phil: an intervention was necessary.
We craved a pantry that was not only well-organized and efficient, but also aesthetically pleasing to the eye. Yes, even pantries deserve a dash of charm! This realization became the catalyst for our pantry makeover journey. It wasn’t just about aesthetics or convenience—it was about creating a space that functioned effortlessly, a space that eliminated the daily stress of rummaging for ingredients.
Planning and Designing the Pantry Layout
Rather than diving headfirst into the DIY arena, we decided to take a beat and really think of the right design.
For months, we deliberated on our ‘pantry personas’. What did we need from our pantry? I dreamed of neat and organized shelves. Our kids wanted snacks within reach. And Mike wanted to utilize the height better (he’s 6’5 after all.)
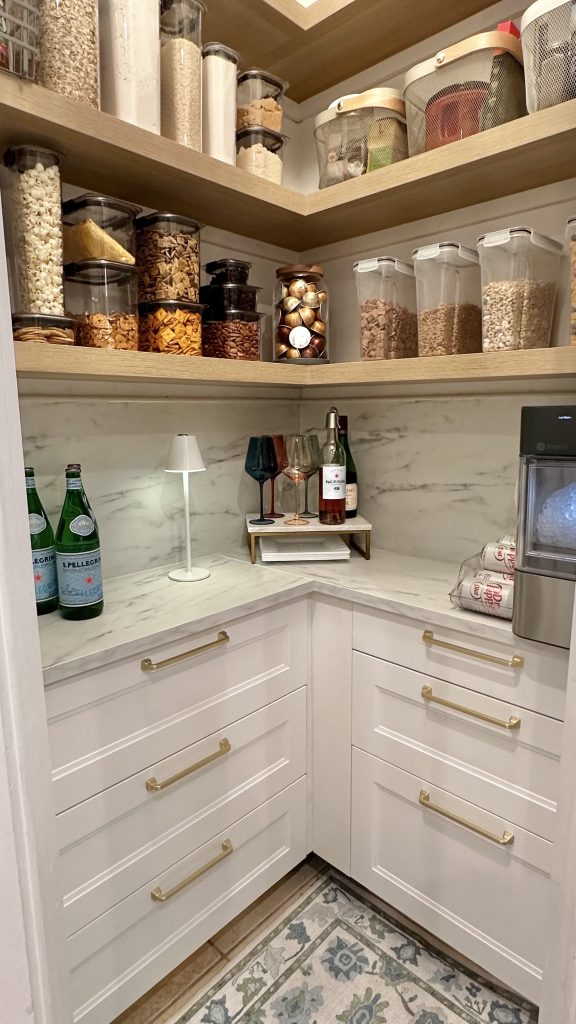
I scoured Pinterest for about three months, pinning pantry inspiration. A lot of the images were of huge pantries in new build homes, but we weren’t working with that sqaure footage. I did notice there were mainly two options. A pantry thart’s entirely shelves from floor to ceiling, with baskets and food out in plain site. Then, there were pantries that utilized cabinetry on the bottom with shelves on top. They appeared more like a Butlet’s pantry, and as someone currently fixated on Sculleries, I gravitated toward that style more.
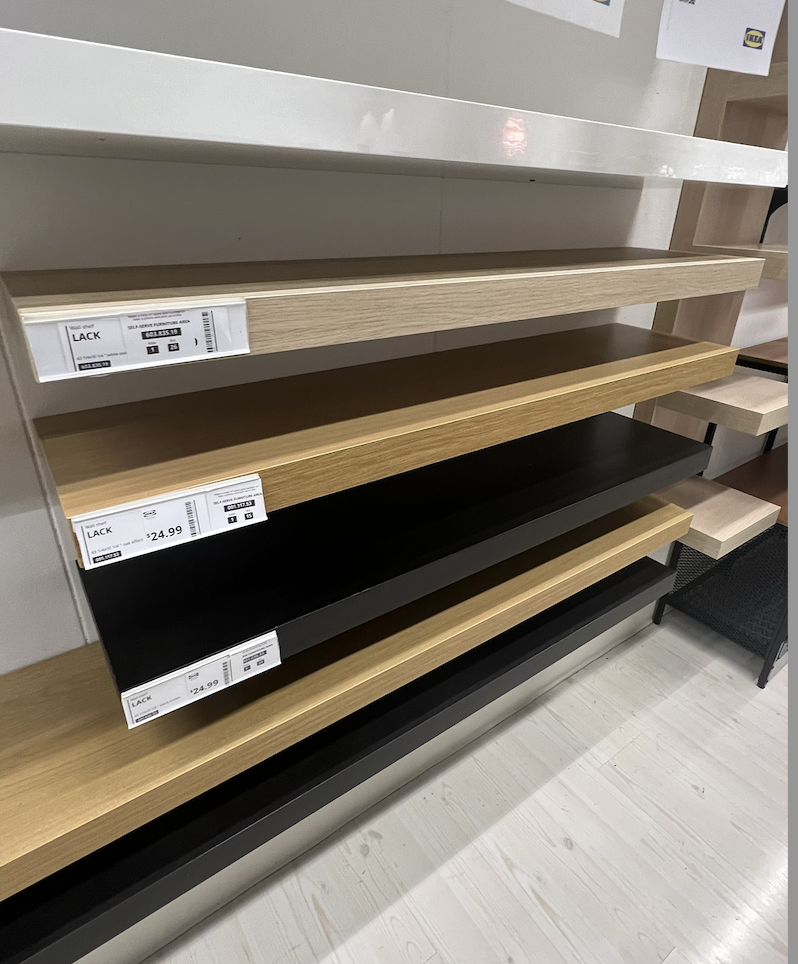
One weekend, we were taking a casual walk through IKEA to shop for our Virginia house, and I came across these Lack shelves. They were just the right depth for our pantry and came in various lengths. They would be perfect! We purchased the 43″ shelves in white stain.
We also had used an IKEA cabinet in our kitchen island before, so I was familiar with them. I love the depth of IKEA cabinets, the endless customization possibilities, and their price point. What if we used two cabinets in the bottom of the pantry and the shelves above it?
We had just used the Axstad three drawer cabinet for our kitchen island project and knew we loved the depth of those drawers. The pantry, however, wasn’t deep enough to allow for full-size cabinets, but luckily the Axstad comes in a 15″ depth! At 15″ deep, we could fully pull out the drawers to access things in the back, which you can’t always say about shelves!
One snag we hit was inventory of the cabinet. They only had one in stock at our store, but they also had a similar one with different drawer depths. We snagged this one too for the other side, and I’m so glad we did because that tall drawer at the bottom is perfect for water bottles.
Decisions were made. We crammed two cabinets and 6 shelves into our car and were off!
Purging and Redefining Our Pantry Storage
Once we got home, the first order of business was to empty our pantry. I pulled everything out of the pantry and here’s how I purged it:
- threw away anything expired, because, obvi
- if something wasn’t food or food-related (like large platters), it either got donated or found a new place in the house where it made sense.
The second tasks of purging things that didn’t belong resulted in a trickle down effect, where I had to find somewhere to store all of those other things. I was storing my air fryer, my Creami, and Instapot in the pantry beforehand, but I knew I didn’t want those in the pantry going forward. Instead, I purged my lower cabinets in my kitchen to make room for those appliances.
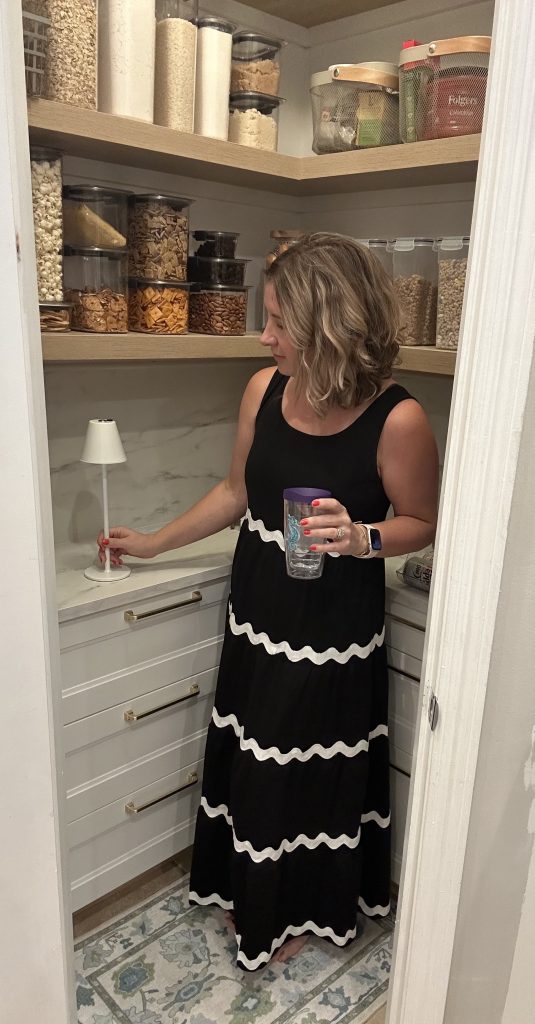
I had been holding onto these storage containers for a few months (waiting for this project), and it was finally their time to shine! I love how clear they are. Other food storage containers are more opaque, and I think that reads dusty overtime. These are crystal clear, and their lid is super tight, but still easy for my kids to take on and off. A win!
I transferred all of our regularly scheduled food purchases into those containers. Things like:
- Cereals
- Granola
- Pretzels
- Cheezits
- Almonds
- Craisins
- Tortilla Chips
I also reordered another set for my baking products.
- Flour
- Sugar
- Gluten-Free Flour
- Brown Sugar
- Rice
- Oatmeal
A little sidenote here – but I never really believed in these storage containers for pantries. I thought they were just for aesthetics! But while they do create a more visually appealing pantry, they also have helped me from overspending. Now, with just a glance, I can see exactly which of our pantry staples needs to be replenished. I was super guilty of just reordering our favorite things without checking if we already had it. When I did this purge, I found 6 bags of pretzels! 6!!!!
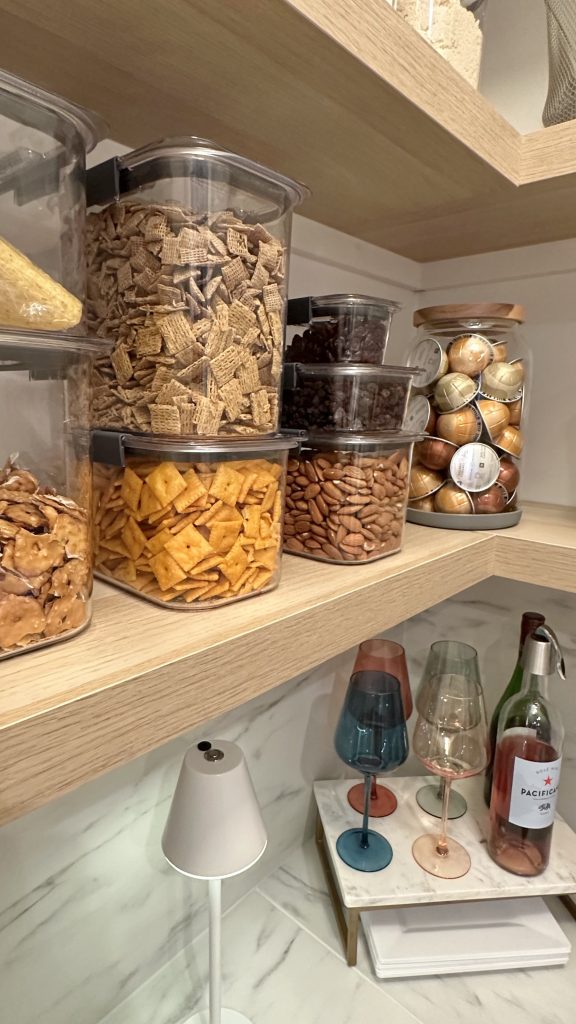
Love these crystal clear storage containers
The Actual DIY Process: A Step-by-Step Guide
While I was doing all of the editing, Mike was working on installing the cabinets and shelves. Luckily, the shelves didn’t require too much editing to fit our space. Mike was able to saw off a bit of the end. He just placed that sawed off side against the wall, but if you’re making a floating shelf that’s visible, you can try to reuse the cap on the end.
To hang the shelves, we used the brackets they come with, but Mike also reinforced them by nailing a strip of wood to the studs on the wall below each shelf. This may be overkill, but we didn’t want to take any risks with the weight of items someone might put on there.
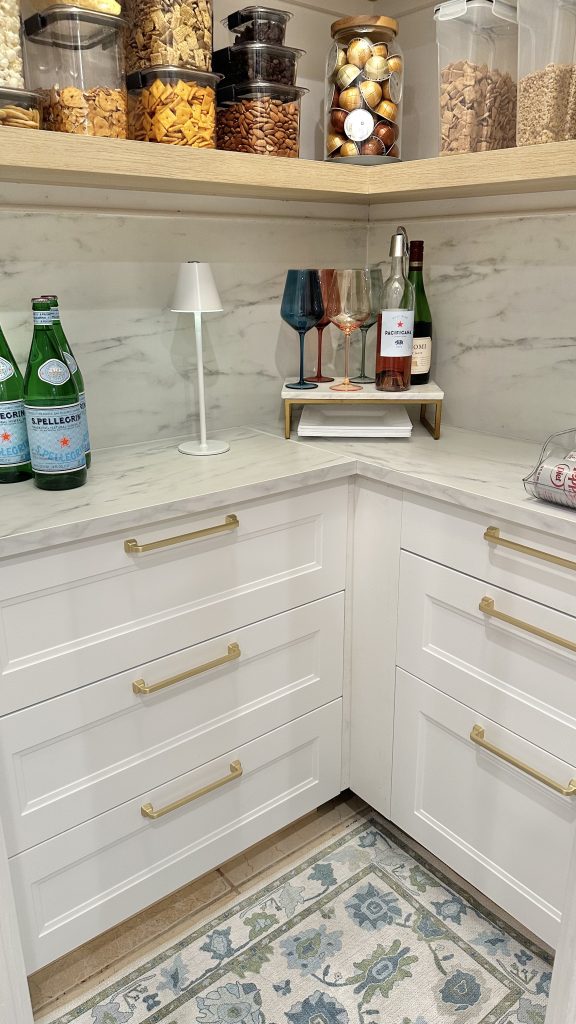
For the cabinets, we used the same drawer pulls that we used in our kitchen. I would say they’re a light gold color. They come in several lengths – here, we used the 7 inch – and are super affordable.
This is unfortunetaly when I realized we should probably paint the walls bright white. Whoops! Mike took down the shelves and I changed the walls from this ugly grey we have here to bright white (Chantilly Lace). It made such a difference in the pantry that I couldn’t leave it out.
Here you can see the difference in the cabinets.
Our last step was to install the countertop and backsplash. If I had this pantry when we changed our kitchen counters this summer, I would have carried the same counters in here, but alas, we didn’t. We found the EKBACKEN laminate counter at IKEA that looked very close, and you can’t beat the price! We decided to also use it for the backsplash so that the space had that same white and neutral color palette throughout (our kitchen backsplash is blue).
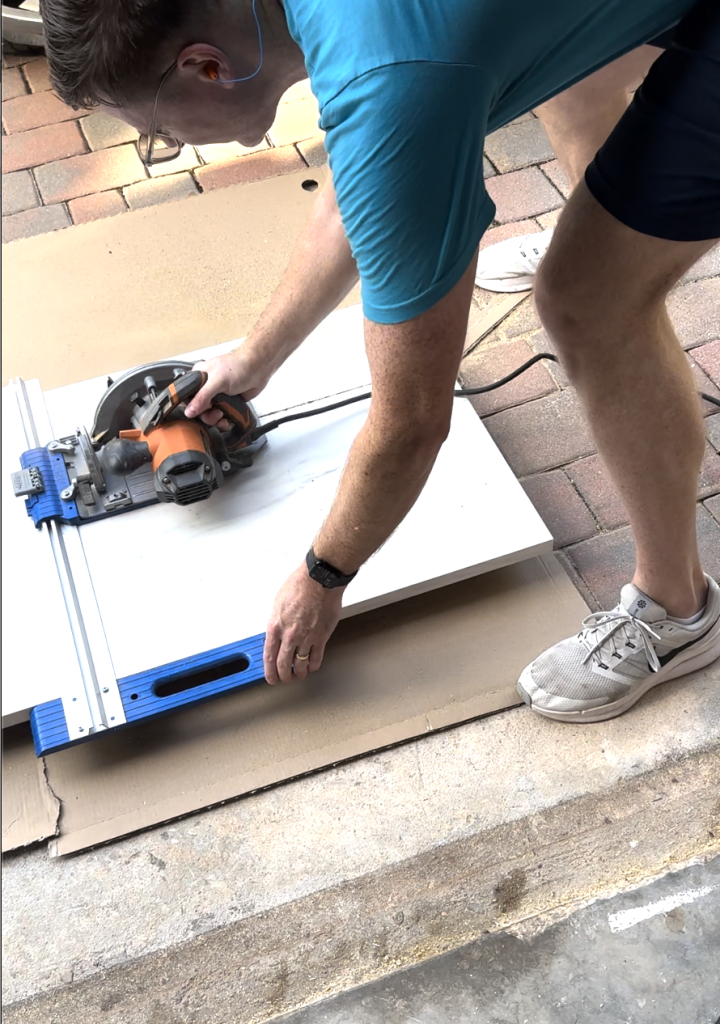
One of the countertops goes from wall to wall. We cut the other countertop short, so that it buts up against the side of the full countertop. We didn’t do a 45 degree angle cut because laminate does tend to fray a bit, so the fewer cuts the better. When cutting it, we put clear masking tape over our cut line. This does help it to fray less.
Mike also found this neat little tool to help cut a straight line.
Deciding Our Pantry Layout
With the shelves up, the cabinets installed, and the countertops in, it was now my favorite time – adding things back in!
I really wanted to be thoughtful about how I loaded food back into the pantry. I thought a lot about what we eat regularly and what makes sense for my kids.
Snacks and cereals are what my kids needed access to (as of writing, they’re 5 and 6, so height is an issue haha). I placed those on the bottom shelf. They’re used to using little step stools around the kitchen, so it wouldn’t be strange for them to get up on a stool to get themselves a snack.
In the drawers, I wanted things that we want access to occassionaly (like maybe for lunch a few times a week or a dinner a few times a week). I also wanted to put things there that weren’t exactly aesthetic, like cans of soup or spaghetti sauce. The other bonus about these drawers is that I can place heavy items there – no more jars of sauce falling off a shelf and exploding on the floor.
In the drawers, I keep:
- Salsa
- Spaghetti Sauce
- Pasta
- Canned Soups
- Macaroni and Cheese
- Snacks (fruit snacks, Chomp sticks)
- Waterbottles
- Dog Treats
- Cookbooks
- I honestly still have room!
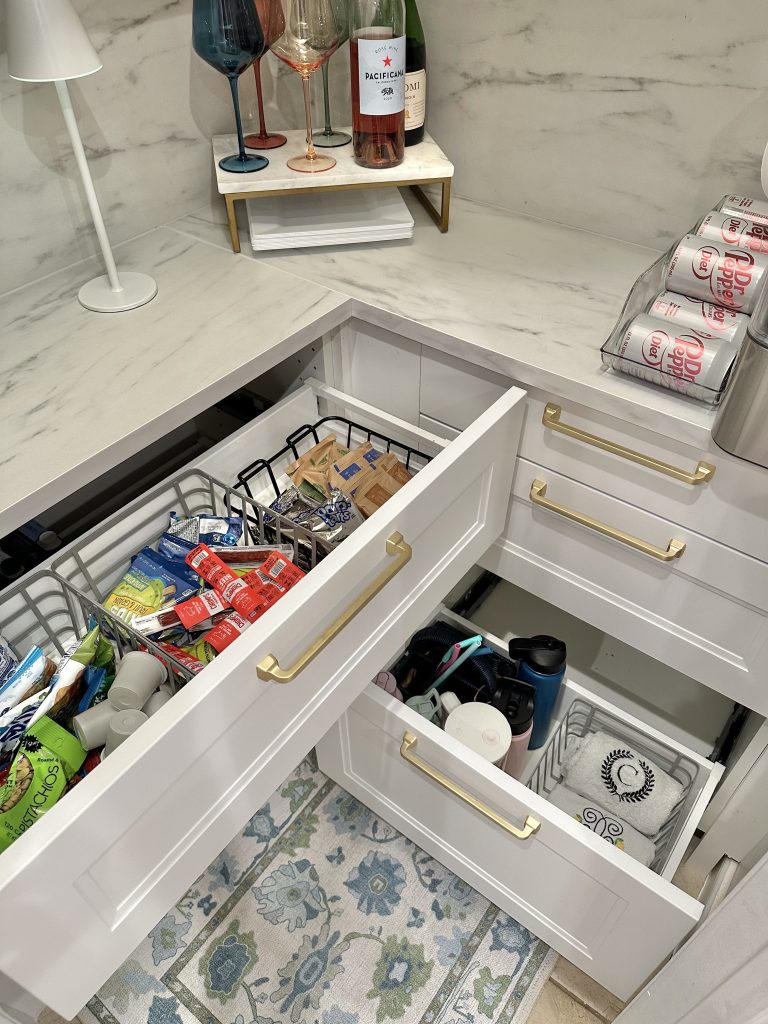
We keep the snackies stocked where our kids can reach them. The bottom big drawer fits 40 oz water bottles standing up!
I also picked up some wire baskets from IKEA that fit the look. In each basket, I keep:
- Teas, honey, and drink mixes
- Coffee and coffee filters (helpful to just grab one basket in the morning for everything)
- Baking supplies (Baking Powder, Cinnamon, Baking Soda)

Adding Even More Functionality to Our Pantry
For our Virginia house, I envision a full-on scullery, with a pantry that also serves as a food prep space. As we rounded the corner of this small pantry makeover, I saw a peek of a Butler’s pantry coming through. What if we added some countertop appliances into here, instead of in our kitchen? I loved the idea, so I got our electrician to add an outlet into the pantry!
I love my pebble ice maker, but it does take up a lot of counter space. I moved that in here right beside our stash of DDP. I’m tempted to also move our Nespresso into here, since an easy morning routine would be to grab your pod and pop it right into the machine from this glass container.
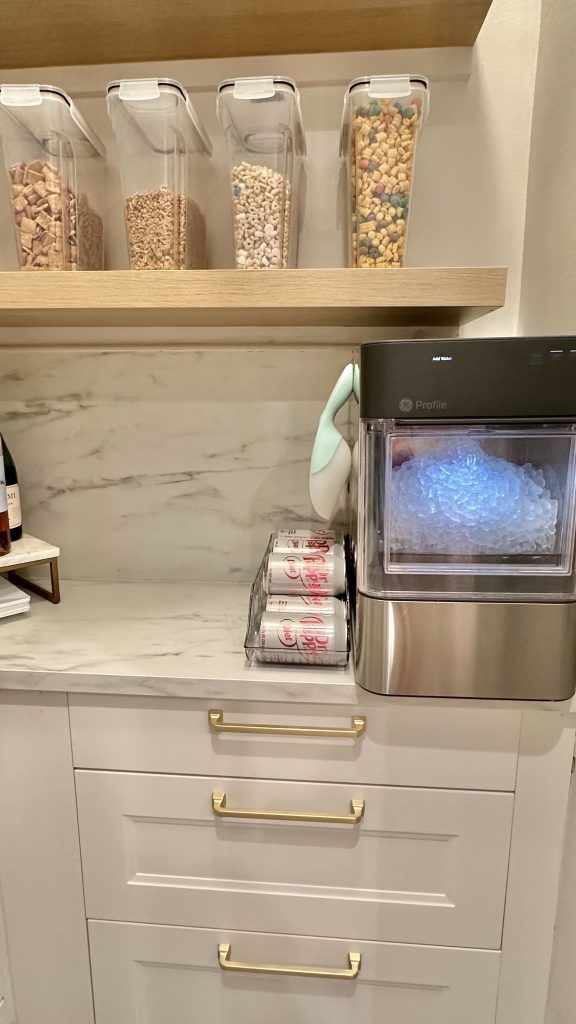
Our drink station. Considering moving our Nespresso in here too!
I also want to add this plastic bag holder onto one of the walls. You can use this for plastic bags or for your trash bags. I love the trash bag idea, since I’m on a mission to get rid of packaging haha!
Lessons Learned from Our DIY Pantry Makeover
Our pantry makeover journey offered us a wealth of valuable insights. Chief among them was the importance of not rushing into renovations. We took our time with this renovation, planning and researching all different ways of making this makeover work. We also really honed in on what we wanted out of this space.
Another lesson we gleaned was the true meaning of organization. It’s not about having the most voluminous pantry. Rather, it’s about maximizing the space you have. It’s about strategic shelving and carefully chosen storage bins. It’s about turning every square inch into a functional, easy-to-navigate, and visually pleasing space.
Finally, we learned that patience truly is a virtue, especially in DIY projects. From waiting for the paint to dry to installing shelves, every stage of our pantry makeover underscored the need for patience. But with every step, we saw our dream pantry slowly take shape, and that made all the waiting worthwhile.
These nuggets of wisdom we gleaned from our pantry makeover journey are not just applicable to future DIY projects, but to life in general. Adaptability, effective use of space, evolving needs, and patience – these are all vital life lessons we didn’t expect to learn from a pantry makeover, but are grateful we did.

Save this image to Pinterest for later!
The Impact of the Pantry Makeover on Our Daily Life
Since the completion of our pantry transformation, our everyday routines have taken on a new, streamlined rhythm. Forget about those frantic scavenger hunts for that elusive can of beans or box of pasta. Now, each ingredient has its designated space, readily accessible when needed, and making meal prep a breeze. Each trip to the grocery store has lost its former challenge of fitting new items into an already overflowing space. With our newly organized pantry, we now have a clear overview of what’s in stock and where to put fresh supplies.
And it’s not just about efficiency – there’s something incredibly satisfying about opening the pantry door to see a beautifully organized array of food items, perfectly placed.
I can’t tell you how many friends I’ve sent a picture of my pantry to this week haha. This successful pantry makeover has injected a spark of joy into our daily routines, and there’s certainly been a trickle down effect for other areas of our house. Stay tuned.
xoxo
Jill