Welcome to our wine bar project! This reimagined space was our kitchen’s original pantry. When we decided to expand the kitchen into the dining room, we used a portion of the dining room for our scullery, which is basically our walk-in pantry with a sink and dishwasher. It’s an amazing space that we’ll share more about soon.
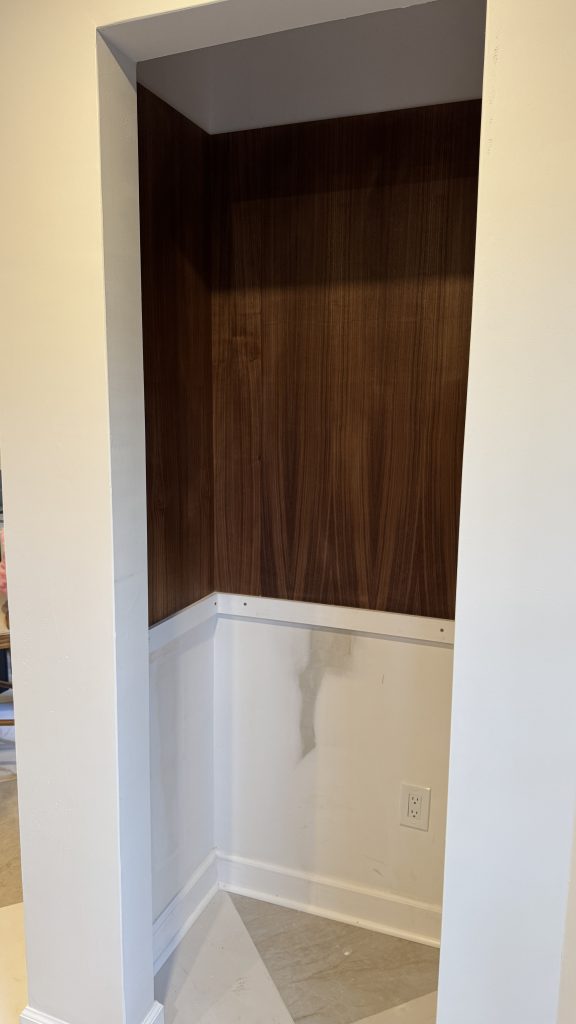
But with that pantry in place, we were left with this empty closet in the kitchen. We had the foresight to ask our contractor to add electrical in this closet because we knew we had bigger plans for it.
This little closet space is straight across from our full-size refrigerator and beside our large kitchen windows.
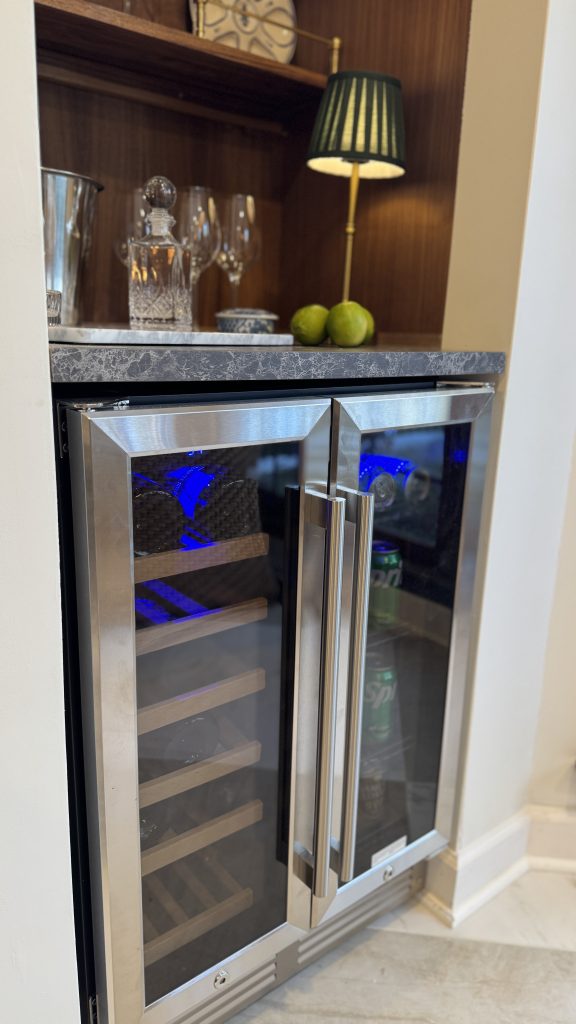
One thing we didn’t have in our kitchen is a wine fridge. We had a wine and beverage refrigerator in our Florida house that we loved, so we decided to recreate it here! This time, we also wanted to add some shelves above it for our glassware.
For the shelves, I’ve always wanted to use brass rails, but I’ve never had a space that necessarily called for them. THE TIME HAD COME!
I knew the shelves would look great, but I didn’t know what to do with the walls. I considered paint (but yawn), wallpaper, and even tile, but Mike and I really don’t love to tile. I definitely wanted it to feel moody and classy – like a Ralph Lauren store, so I had an idea to wrap it in wood.
Our Brass Rail Shelves + Wine Bar Shopping List
- Plywood panels for the wall (we used 5 panels)
- Brass rails
- Brass posts (we used ends and centers, no corners)
- Walnut boards that we cut into shelves
- Countertop
- Mini Hack Saw
- Construction Adhesive (Lock-tight or Liquid Nails)
- Nails
- Screws for the posts and screwing the shelves into the studs
- Stud finder
- A level
- A laser level (not necessary but helpful)
Step One: Start By Measuring Your Space
Measure the space where you’d like your shelves. Once you determine how long you want your shelves to be, you’ll order the right amount of materials to create it. The walnut boards we used were 8 feet long and 8 inches wide, so if you want to make shelves that are anything less than 4 feet long, you could cut them in half and get two shelves out of one board. Measure your wall, if you’d also like to wrap the closet in the walnut plywood. Order your materials.
Step Two: Find The Studs In Your Wall
If you’ll be covering your wall, you should find the studs in your wall before covering them and mark them. We use this stud finder.
Step Three: Add Your Countertop On Top of Your Wine Fridge
We did this step last while we were waiting for our wine fridge, but if we did it again, we’d install the countertop first on top of the cabinet or wine fridge. If you’re just creating shelves over an already existing cabinet, disregard this message haha. We used this countertop from IKEA, and Mike used a handsaw to cut the countertop. We recommend taping the line that you’re cutting on the countertop to help prevent the laminate from chipping. Mike used a handsaw so he could be more delicate with the cuts (ours had notches, while yours might just be a straight cut).
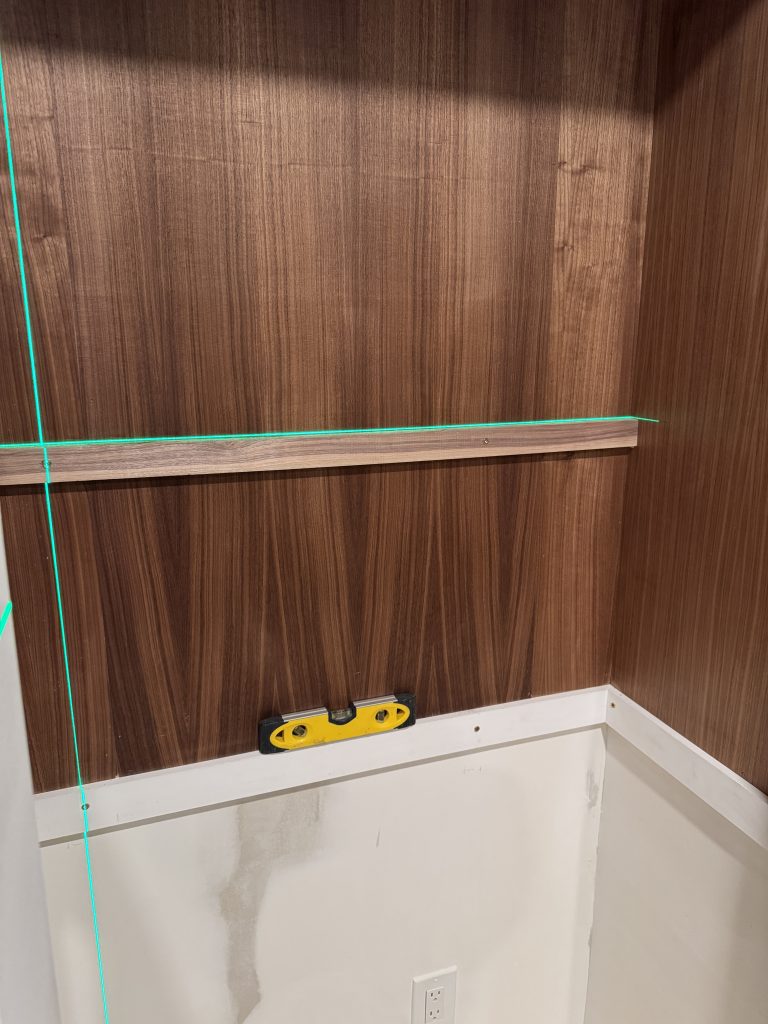
Make sure your countertop is level because you’ll be installing everything else based off of that. Here, instead of the countertop, Mike used a cleat that was level as a ledger for the plywood.
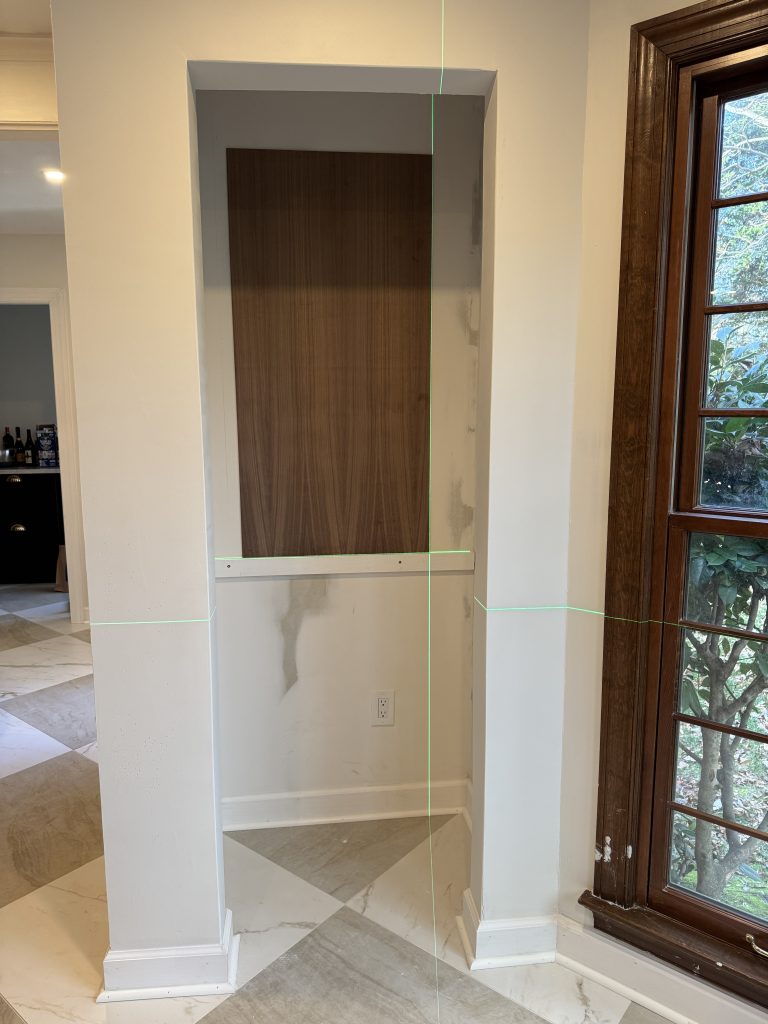
Step Four: Wrap Your Walls with the Wood Backsplash
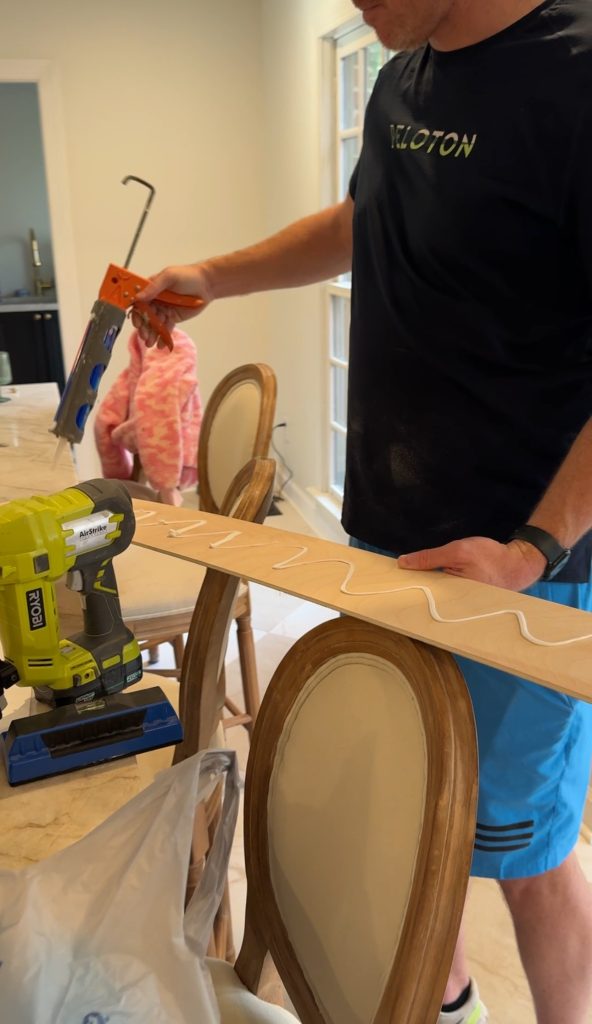
Measure and cut your plywood, starting with the back wall. We cut ours with the grain going vertically so that seams would be less apparent. Mike used a tablesaw to cut the panels, but you could also use a hand saw if you don’t have power tools. Mike then glued the back of the panels and applied them to the walls. He then added a few pin nails into the studs to help hold it.
Step 5: Hanging the Shelves
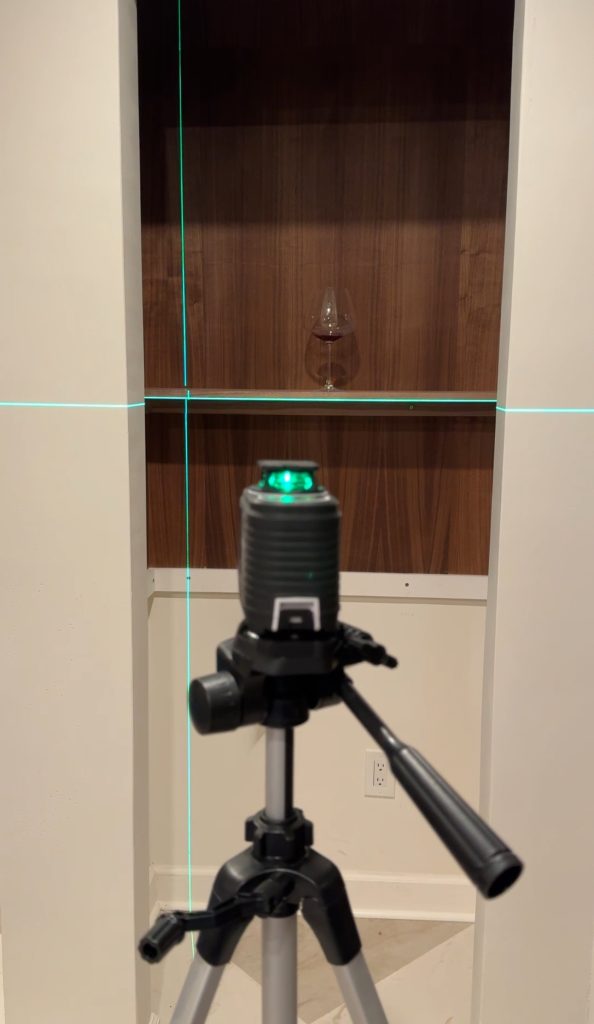
Determine the height and spacing of your shelves. I knew I wanted this to be a bar, so I made sure that my first shelf was at least high enough for a wine bottle to fit under. I also held up my coffee maker, in case I want that in the future. Our first shelf is 19″ above the countertop. From there, I wanted my shelves to hold wine glasses, so I placed a wine glass on the first shelf, and we made the second shelf 13″ above the first shelf, and so forth.
With the length and spacing of the shelves determined, Mike created support cleats for the shelves.
the first support cleat of the first shelf
For the back wall, he screwed a small support cleat into the wood and wall’s studs. This is why it’s important to mark where the studs are before you cover the wall.
He then glued a shorter support cleat to the side walls. Those walls don’t have studs (for us), so glued worked best here.
With the spacing of the shelves in place, he then went and cut the shelves to the proper width. Mike cut the shelves down to size (36″) with a miter saw, but you could use any saw here.
Quick note – Don’t yet glue down your shelf. You still need to add the brass rails, and it helps to have the shelves in hand.

Here’s a close up of the support cleats
Step 6: Add Your Brass Rails
Take your shelves and add your brass rails to them. For ours, we ordered center posts and end posts. Center posts have holes on both sides so the rail can pass through them. End posts have holes on one side, so they’re great for the end of a shelf or line. If you want to create a “return” for your shelf, so that the rail makes a right angle and continues on the sides, you’ll want to order a ‘corner’ post to make that happen.
Mike used this hand saw to saw the rails to size. I thought this would be the most challenging part, but he said brass is relatively soft, so you can cut it with a hand saw just fine. Who knew!
Lay out your brass rails in the line that you’d like. We added them back into the closet before securing anything to make sure the rails were aligned vertically (this is where the laser level helps). Then, Mike screwed them into place. The posts have holes at the bottom so you can screw them down.

We made sure the posts aligned vertically before screwing them.
With the shelves up, we then installed our countertop (but remember, we would recommend doing this first) and pushed our new wine fridge under it. Here’s a shot of Mike in a tiny space that I love. HA

big man in a tiny space
There you have it! We’re in love with this space and the cozy vibes it created in our kitchen. I can’t wait to see your gallery rail shelves, so if you complete this DIY, be sure to tag me @classicallyjill.
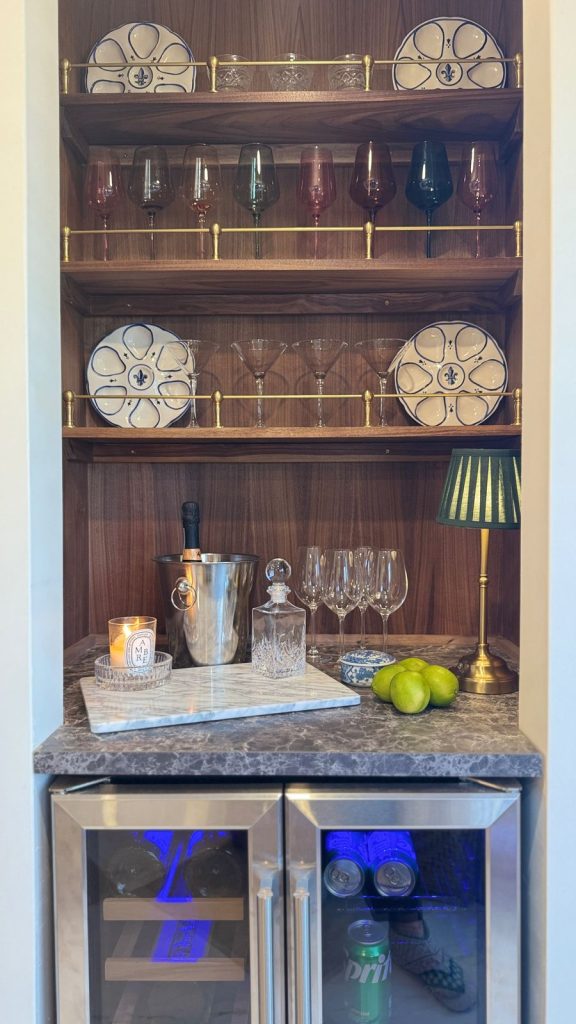
Our new wine bar in the original pantry
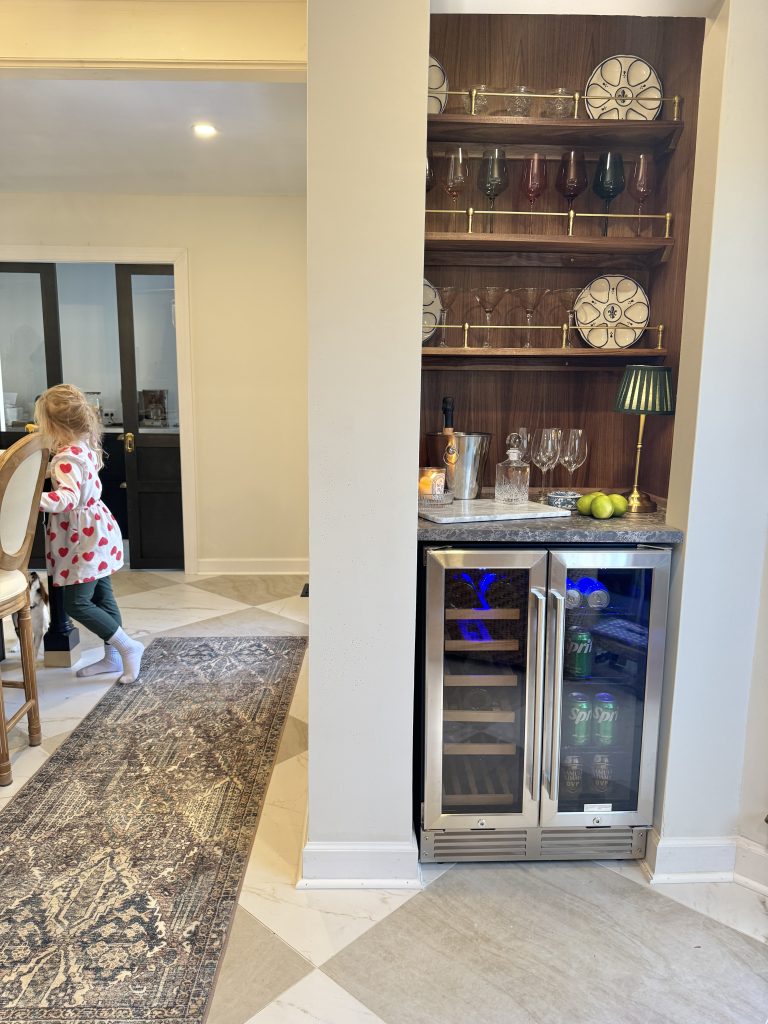

Our new wine bar in the original pantry