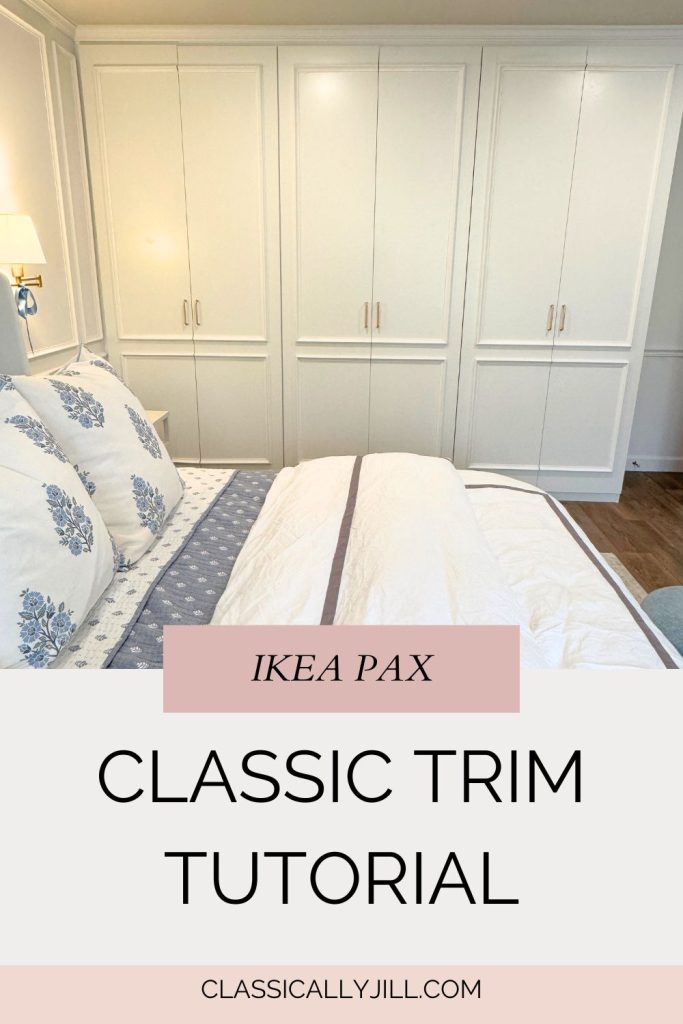
When we decided to tackle our wardrobe closets, I knew I wanted something that felt custom—but without the fully custom price tag. I wanted millwork vibes, thoughtful storage, and a design that felt intentional and architectural, not like an afterthought. After a lot of planning and measuring, we landed on a solution I still recommend all the time: IKEA PAX wardrobes, customized to look completely built-in.
They truly exceeded our expectations.
Why We Chose IKEA PAX
The beauty of the PAX system is flexibility. You can design it around how you actually live—what you hang, what you fold, and what you want visible versus hidden. It gives you a clean, modern foundation that’s incredibly easy to customize.
What sold us was the ability to create a high-end look using a modular system, without being locked into a single layout or price point.
Designing the Layout
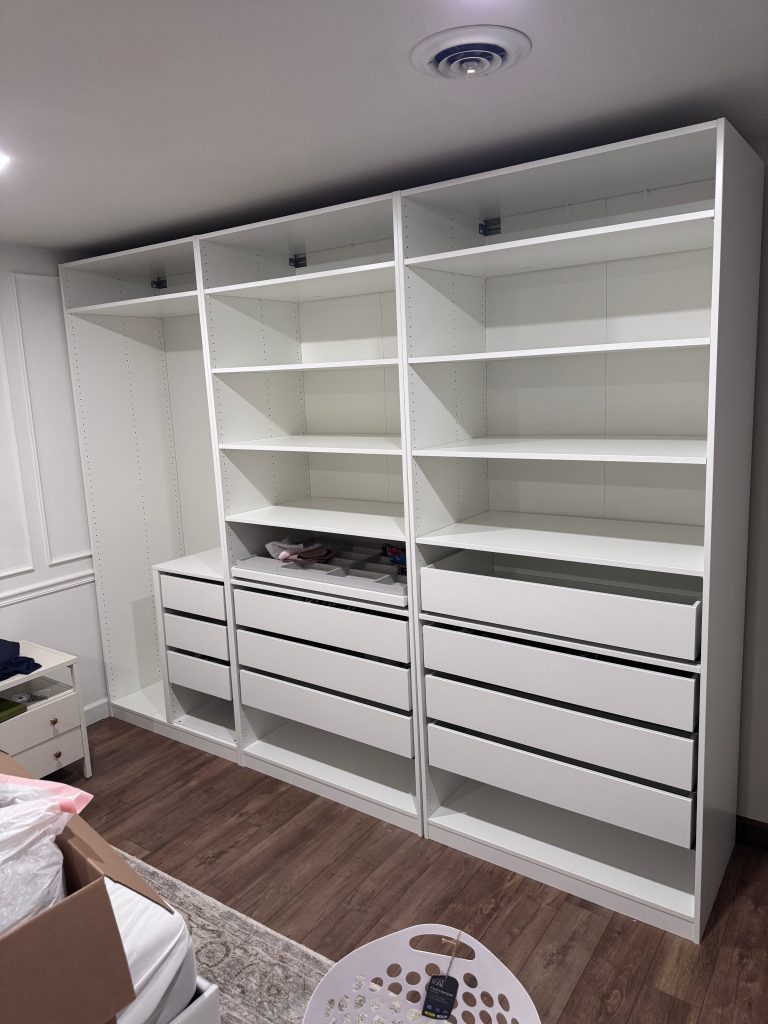
Before ordering anything, we spent a lot of time planning the layout using IKEA’s PAX Planning tool. This is the most important step. We thought through hanging space, drawer height, and shelf spacing, and purged our clothes down to what we really need at-the-ready.
Another benefit to using this tool is that when you’re finished designing, it adds all of the necessary pieces into your cart (even things like hinges that you might forget).
In the end, I wanted the jewelry pull-out tray, whereas Mike wanted another drawer. I needed a little bit of hanging space, wheres Mike needed none (#retiredlyfe)
Truly the benefit to the PAX is the customization, so we took our time with this part to get it right for us.
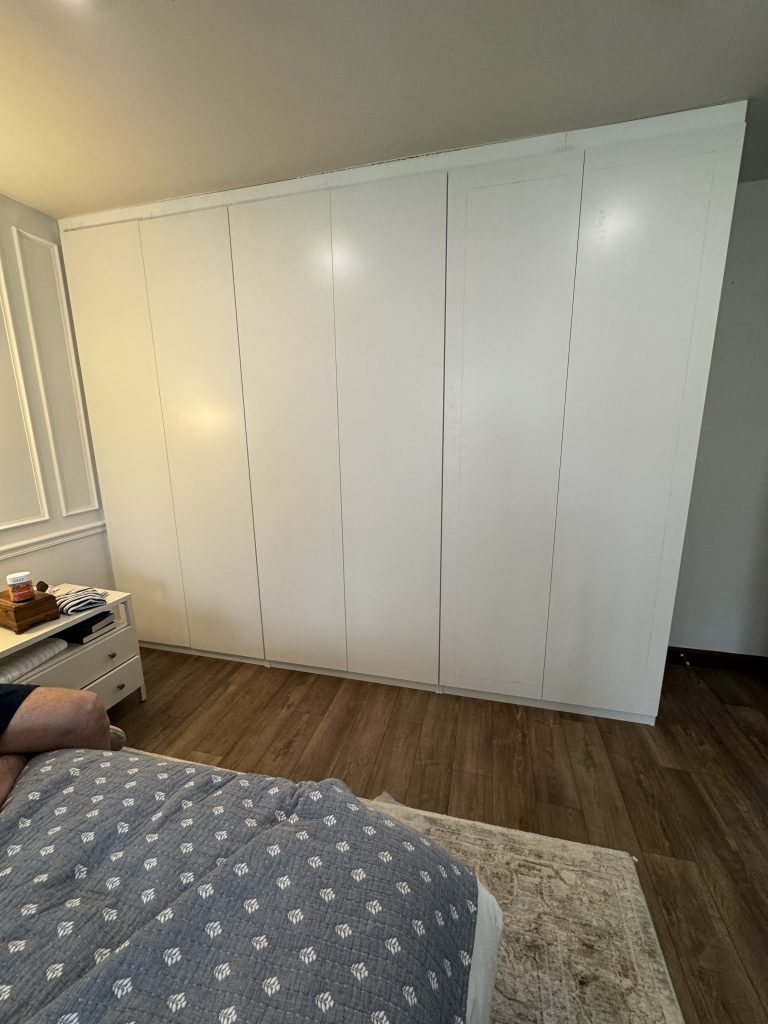
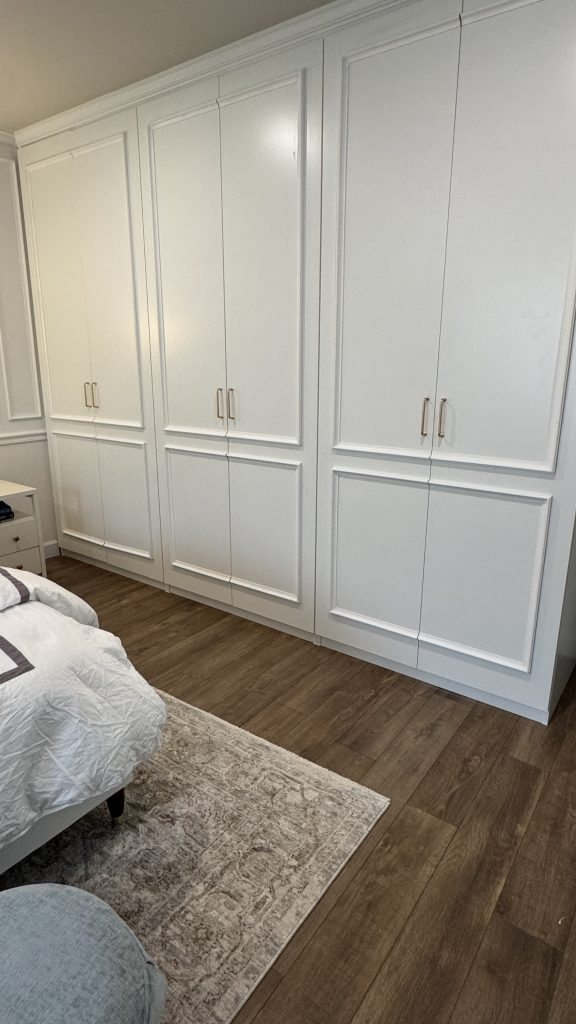
Adding the Doors + Creating a Built-In Look
Once the wardrobes were installed, we added the doors—and this is where the transformation really began.
We chose flat white doors (called Forsand) with no raised panels or decorative detail. They’re completely clean and modern, which made them the perfect blank canvas for adding trim. On their own, the doors are simple, but paired with molding they can go in a much more traditional or classic direction.
At the top, we added trim to cover the small gap between the tops of the wardrobes and the ceiling. This step is essential if you want them to look built-in. Later, we finished this area with crown molding using the same profile that runs throughout the bedroom, which helped everything feel seamless and architectural.
Matching the Picture Frame Molding in the Room
Our bedroom already has picture frame molding on the walls, so we wanted the closet doors to mimic that same pattern. The goal was for the wardrobes to feel like part of the room, not a separate element sitting inside it.
We debated giving each door its own picture frame, but after mocking it up visually, we preferred a cleaner approach. We went with three picture frame boxes across six doors, with each box split in the middle. This felt less busy, and it aligned beautifully with the molding pattern on the walls.
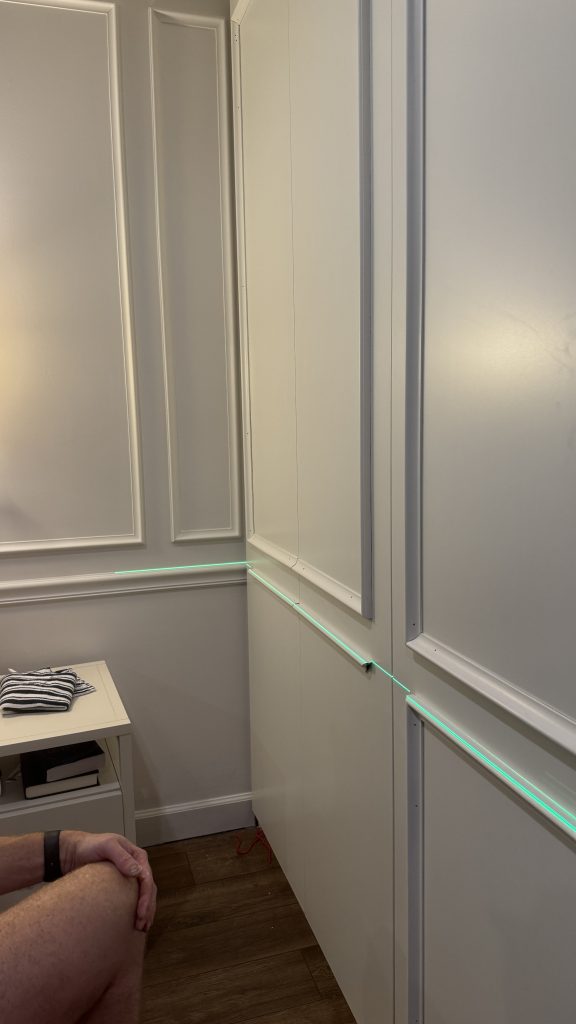
Mike’s Best Tip: Use a Laser Level
Precision really matters here, and Mike’s biggest recommendation is to use a laser level.
Even if you measure carefully, floors and ceilings are rarely perfectly straight. A laser level allows you to establish one consistent, perfectly straight line across the entire wall and build everything off of that. Once the first horizontal piece was installed, all of the other trim pieces were built from that reference point.

Installing the Trim on the Doors
This part required a bit of extra care because the doors are only about half an inch thick. Trim pieces were cut outside, then brought upstairs and installed directly onto the doors using a nail gun.
A few key details:
-
We used 5/8-inch nails to avoid shooting through the door
-
We skipped liquid nails because the trim tended to slide while nailing
-
Since the trim isn’t holding weight, nails alone were more than sufficient
It was slow, careful work, but very doable.

Pre-Painting the Trim (Highly Recommend)
Originally, we planned to install all of the trim and then paint everything. Instead, we decided to pre-paint all of the trim pieces before installing them.
We color-matched the white PAX doors to Benjamin Moore White Heron. We only needed a small quart since it was just for the molding. Once everything was installed, all that was left to do was fill nail holes with wood filler and touch up the paint (Jill’s contribution).
This saved a huge amount of time and avoided having to repaint the doors entirely.

Time Commitment
Adding all of the trim molding took about six hours total, all in one day. It’s detailed work, but not complicated—just precise and methodical.

Hardware + Final Finishing Touches
Once the trim was complete, we added gold handles to tie in with the gold sconces in the room. That small detail added warmth and helped the wardrobes feel styled rather than purely functional.
Then, we caulked around all of the molding.
The final step was installing crown molding at the top, using the same molding that runs throughout the bedroom. This truly made the wardrobes feel like they’ve always been part of the house.
At that point, they no longer felt like furniture—they felt like architecture.
Why I Love This IKEA Pax Makeover
This IKEA PAX renovation completely transformed how we use our bedroom. Before, we had a single dresser with nothing above it, which meant a lot of wasted space. By replacing our dressers with the PAX system, we were able to fully maximize both the vertical and horizontal space in the room—and ultimately get rid of both of our dressers entirely.
What I love most is how much neater and calmer the bedroom feels. We’re not constantly leaving drawers pulled out or clothes piled on top the way we did with dressers. Everything has a designated place, from sweaters and shoes to seasonal items, and it all stays tucked away behind closed doors. I’m hardly even using one entire side of the wardrobe, which we’ve turned into dedicated storage for extra linens and towels.
I know a lot of people hesitate with IKEA PAX because it can lean modern or Scandinavian, but the facelift we gave these doors completely changed the feel. The added molding and trim brought in a classic, timeless look that blends beautifully with the rest of our home.
If you’re craving more storage, want to ditch your dresser, and love the idea of making a subtle but impactful statement in your bedroom, I can’t recommend this renovation enough.